
Health
Calamariere: Your Ultimate Guide to Mastering This Seafood Favorite
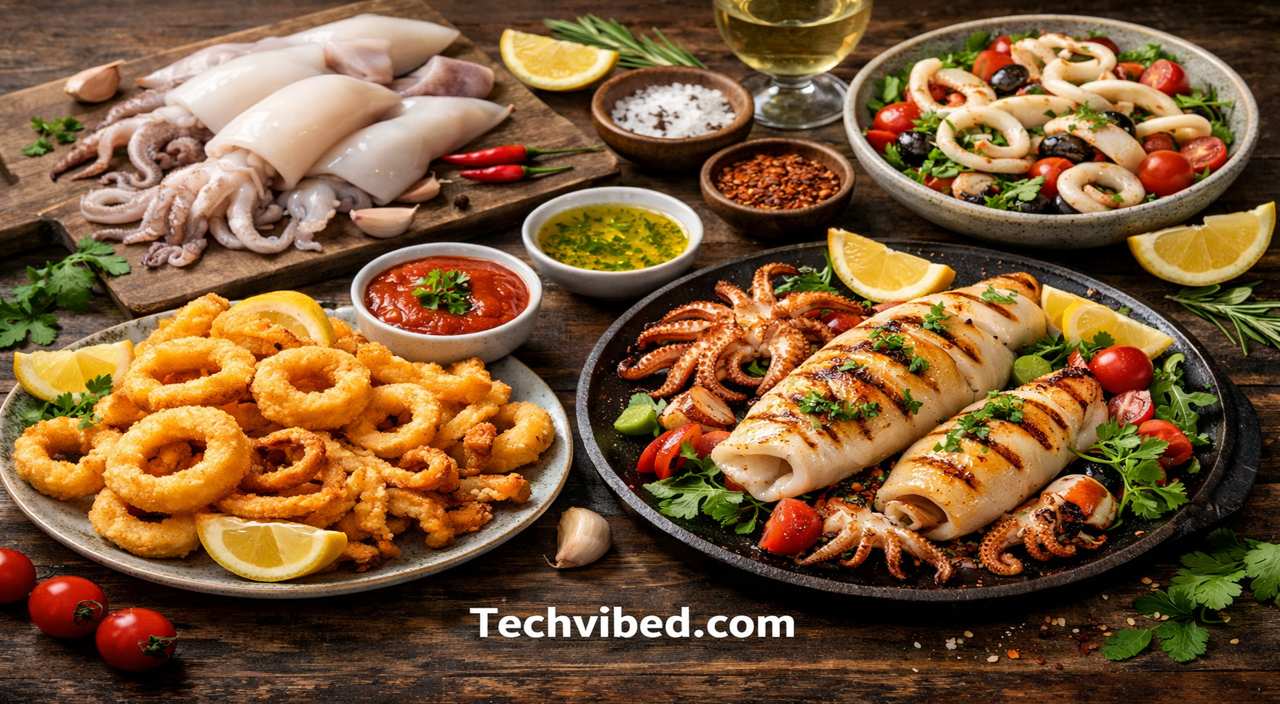
Calamariere is a term that captures the skill and tradition of preparing squid in tasty ways, mainly from Italian cooking roots. It covers everything from picking fresh squid to using different cooking methods that bring out its soft texture and mild flavor. This guide will help you understand calamariere fully, with step-by-step advice, recipes, and tips to make it at home. Whether you are new to cooking seafood or want to improve your skills, this post offers practical knowledge to create great dishes. By the end, you will feel confident in handling squid and enjoying its benefits.
What Is Calamariere?
Calamariere refers to the careful process of cooking squid, often seen in Italian food. It includes various styles like frying, grilling, or mixing in salads, all aimed at keeping the squid tender and full of flavor. The word comes from “calamari,” which means squid in Italian, but calamariere adds a focus on the craft and methods used. People who practice calamariere pay close attention to fresh ingredients and quick cooking to avoid tough results. This makes it a popular choice in restaurants and home kitchens for its simple yet impressive outcomes. Unlike other seafood, squid in calamariere can adapt to many tastes, from spicy to light and fresh.
In more detail, calamariere is not just a dish but a way of approaching squid preparation. It stresses balance in seasoning and texture, using basic tools like knives for cleaning and pans for cooking. For beginners, it starts with understanding squid’s body parts, like the tube and tentacles, which both can be used. Experts in calamariere often experiment with herbs, acids like lemon, and coatings for crunch. This approach turns a basic sea creature into a meal that feels special. Its popularity grows because it fits many diets and can be made quickly for weeknight dinners or parties.
Calamariere also stands out for its versatility in menus. It can be an appetizer, main course, or part of a larger spread. In Italian culture, it ties to coastal life where fresh squid is common. Today, it appears in global kitchens, blended with local spices. Learning calamariere means gaining skills that apply to other seafood too, like octopus or shrimp. Overall, it is about respect for the ingredient and enjoying the results with family or friends.
The History of Calamariere
Calamariere has deep ties to Mediterranean areas, especially Italy, where squid fishing began long ago. Fishermen in coastal towns caught squid and created simple recipes to use every part. Over time, these methods spread across regions, each adding their own twists with local herbs or sauces. By the Middle Ages, squid dishes became common in daily meals due to its low cost and availability. This laid the foundation for what we now call calamariere, a practice honoring fresh sea food. It shows how food traditions grow from need into art.
As trade routes opened, calamariere influenced other cultures. In the Renaissance period, Italian cooks shared ideas with Europe, leading to new variations. For example, Spain developed battered squid rings, while Greece focused on grilled versions with olive oil. In Asia, similar dishes like tempura emerged, though not directly linked. The 20th century saw calamariere go global through immigration and restaurants. Today, it mixes old ways with modern tastes, like adding fusion elements. This history highlights how calamariere adapts while keeping its core simple appeal.
Understanding this background helps appreciate calamariere more. It started as survival food for seafarers but became a symbol of Italian hospitality. Festivals in Italy still celebrate squid with community cooking events. Books and family recipes pass down secrets, ensuring the tradition lives on. For home cooks, knowing this inspires trying authentic methods. It also encourages sustainable fishing to protect squid populations for future generations.
How to Choose and Clean Squid for Calamariere
Picking the right squid is key to good calamariere. Look for fresh ones with shiny, clear skin and firm bodies. Avoid any with a strong fish smell or dull colors, as these signs mean they are not fresh. Size matters too; smaller squid are often more tender for frying, while larger ones suit grilling. At the market, ask for cleaned squid to save time, but learning to do it yourself gives better control. Fresh squid should feel cool and moist, not slimy. This step sets up success in your dish.
Cleaning squid for calamariere is straightforward with practice. Start by holding the head and pulling it away from the body tube. Remove the clear cartilage inside the tube, which looks like plastic. Cut off the tentacles just below the eyes and discard the head. Peel off the purple skin if you want a cleaner look, though some leave it for flavor. Rinse everything under cold water to remove any grit. Pat dry with paper towels before cutting into rings or strips. This process takes about 5 minutes per squid and prevents tough bites.
Once cleaned, store squid properly for calamariere. Keep it in the fridge on ice for up to two days, or freeze for longer. Thaw in the fridge to maintain texture. Cleaning in batches helps for bigger meals. Tools like sharp knives and cutting boards make it easy. Beginners might watch online videos for visual help. Mastering this builds confidence for more complex calamariere recipes.
Will You Check This Article: Betametacron: Your Full Guide to This Key Medication
Preparation Techniques in Calamariere
Frying Calamariere
Frying is a classic technique in calamariere that creates a crispy outside with a soft inside. Heat oil to 350°F in a deep pan. Coat squid rings in a mix of flour, salt, and pepper, or add cornstarch for extra crunch. Fry in small groups for 2-3 minutes until golden. Do not crowd the pan, or the temperature drops, leading to soggy results. Drain on paper towels and serve hot with lemon wedges. This method works well for appetizers and brings out squid’s natural sweetness.
To make frying better in calamariere, try marinating squid first in milk or buttermilk for tenderness. Add spices like paprika or garlic powder to the coating for flavor. Use vegetable or peanut oil for high smoke points. Test oil heat by dropping a small piece; it should sizzle right away. After frying, season with sea salt while warm. This technique is quick and forgiving for home cooks, making it a go-to for busy nights.
Grilling Calamariere
Grilling adds a smoky taste to calamariere without much oil. Marinate squid in olive oil, garlic, and herbs for 30 minutes. Heat the grill to medium-high and cook for 1-2 minutes per side until charred but not overdone. Score the tube lightly to prevent curling. Tentacles grill well too, getting crispy edges. Serve with a squeeze of lemon for brightness. This method is healthier and great for outdoor meals.
For best grilling in calamariere, use whole bodies or large pieces to avoid falling through grates. Brush with oil to prevent sticking. Watch closely, as squid cooks fast. Pair with veggies like peppers for a full dish. Indoor grill pans work if no outdoor setup. This technique highlights squid’s fresh flavor and is ideal for summer gatherings.
Other Methods in Calamariere
Steaming or sautéing are gentle ways in calamariere for tender results. Steam squid for 5 minutes with aromatics like ginger. Sauté in a hot pan with butter and herbs for 3 minutes. Braising in tomato sauce softens larger squid over low heat for 30 minutes. These methods keep moisture and allow flavors to soak in. They suit stews or pasta dishes.
Experimenting with these in calamariere opens new ideas. For example, stuff tubes with rice and bake. Or add to soups for quick protein. Always time carefully to avoid rubbery texture. These options make calamariere fit any meal type, from light to hearty.
Popular Calamariere Recipes
Classic Fried Calamariere
For classic fried calamariere, you need 1 pound cleaned squid, 1 cup flour, salt, pepper, and oil for frying. Cut squid into rings and tentacles. Mix flour with seasonings. Dredge squid in the mix, shake off extra. Fry in hot oil until crisp, about 2 minutes. Serve with marinara sauce or aioli. This recipe serves 4 as an appetizer. It is simple and always a hit at parties.
Make it your own by adding herbs to the flour or using beer batter for lightness. Prep time is 15 minutes, cook time 10. Calories per serving around 250. Kids like it for the crunch, and it pairs with salads for balance. Store leftovers in the fridge and reheat in oven to keep crisp.
Grilled Calamariere
Grilled calamariere uses 1 pound squid, olive oil, garlic, lemon, and herbs. Clean and marinate for 20 minutes. Grill 2 minutes each side. Slice and toss with more lemon. Serves 4. This is light and ready in 30 minutes total.
Add chili for heat or serve over greens. It is low in fat, about 150 calories per serving. Great for diets, and the char adds depth. Use skewers for easy flipping.
Calamariere Salad
For calamariere salad, cook 1 pound squid by boiling briefly, then cool. Mix with tomatoes, onions, olives, and vinaigrette. Chill for flavors to blend. Serves 4 as a side. Fresh and healthy option.
Vary with cucumber or feta. Prep in 20 minutes, no cooking needed after boiling. Around 200 calories, full of veggies.
Health Benefits of Calamariere
Eating calamariere offers many health perks because squid is lean and nutrient-rich. It provides high protein with low calories, helping with weight control and muscle building. Omega-3 fats in it support heart health by reducing bad cholesterol. Vitamins like B12 aid in energy and nerve function. Minerals such as selenium fight cell damage. When prepared grilled or steamed, it keeps these benefits without added fats. This makes calamariere a smart choice for balanced eating.
More benefits include low carbs, fitting keto or low-sugar diets. Phosphorus helps bone strength, and copper boosts immunity. Compared to red meat, it has less saturated fat. Portion control matters, as fried versions add calories. Include it weekly for variety in seafood intake. Consult doctors if allergies exist, but for most, it adds value to meals.
Tips for Perfect Calamariere Every Time
To get great calamariere, always use fresh squid and cook quickly. Marinate to add flavor but not too long to avoid toughness. Dry squid well before coating for better crisp. Heat oil properly for frying. Try different seasonings to match your taste. Practice cleaning to save money. Store extras airtight. These steps ensure consistent results.
More tips: Use a thermometer for oil temperature. Batch cook to keep heat steady. Rest after cooking for juices to settle. Pair with acids like vinegar for balance. Read recipes fully before starting. Share with others for feedback. Building these habits turns you into a calamariere pro.
Common Mistakes When Making Calamariere
A big mistake in calamariere is overcooking, which makes squid chewy. Cook only until opaque. Another is not cleaning well, leaving grit or ink. Always rinse thoroughly. Using old squid leads to bad taste; check freshness. Crowding the pan lowers temperature, causing sogginess. Fry in small amounts. Skipping pat dry means steam instead of sear. Avoid these for better dishes.
Other errors: Too much batter hides the flavor. Use light coats. Ignoring marinade time misses tenderness. Not experimenting limits variety. Forgetting safety with hot oil risks burns. Learn from tries to improve.
Calamariere Variations Around the World
In Italy, calamariere often means fried rings with lemon. Spain has “calamares” battered and served as tapas. Greece grills with herbs and oil. Asia offers stir-fried squid with veggies in Thailand or tempura in Japan. Latin America adds spice in ceviche-style. These show how calamariere changes with culture.
Each place uses local items, like coconut in tropical areas or soy in East Asia. This global view inspires mixing styles at home, like Italian-Asian fusion.
Pairing Calamariere with Sides and Drinks
Pair calamariere with fresh salads or bread to soak sauces. Veggies like zucchini add crunch. For drinks, white wines like Pinot Grigio cut richness. Beer works for fried types. Lemon water refreshes. These choices enhance the meal.
More ideas: Rice pilaf for grilled, potatoes for fried. Herbal teas for light options. Match intensity; spicy calamariere with bold drinks.
Conclusion
Calamariere brings joy through its simple yet flavorful ways with squid. This guide covers basics to advanced tips, helping you create memorable meals. Try recipes and techniques to find favorites. With practice, you will master calamariere and share it with others. Enjoy the process and the tastes it offers.
Share this content:

Petdardas com stands out as a helpful online spot for people who love animals. This site brings together useful advice, tools, and a group of like-minded folks to make owning a pet easier and more fun. If you have a dog, cat, bird, or even a reptile, petdardas com offers info on health, training, and daily needs. It aims to help new and long-time pet owners give their animals the best life possible. With easy-to-find sections and fresh updates, it’s like having a pet expert right at your fingertips. Many users turn to it for quick answers and long-term plans.
What is Petdardas Com?
Petdardas com is an online hub made just for pet lovers. It gives free access to a wide range of topics on animal care, from basic feeding to handling tough health issues. The site started as a way to share knowledge among pet owners who found it hard to get good info in one place. Now, it covers dogs, cats, small pets like hamsters, and even exotic ones like snakes. Users can read articles, watch videos, and join talks. What makes it special is the mix of expert input from vets and real stories from everyday people. This setup ensures the content stays practical and up to date with current trends in animal welfare.
Unlike other sites that focus only on selling products, petdardas com puts education first. It includes guides on choosing the right food, spotting signs of illness early, and setting up a safe home for your pet. The layout is simple, with search tools to find what you need fast. For example, if your cat has behavior problems, you can find step-by-step fixes based on science. This approach helps build trust, as all advice comes from checked sources. Overall, it’s a full package that supports pet owners at every stage, from adoption to old age care.
The Mission Behind Petdardas Com
The main goal of petdardas com is to make pet ownership simple and rewarding for everyone. Founders saw that many people struggle with finding reliable info, so they built a place where quality comes first. They work with vets, trainers, and nutrition experts to create content that’s accurate and easy to use. This mission focuses on preventing problems before they start, like teaching about regular check-ups or balanced diets. By doing this, the site helps reduce trips to the vet and keeps pets happier longer.
Petdardas com also wants to create a sense of belonging among users. It encourages sharing tips and experiences, turning visitors into active members. For instance, if someone has a rescue dog with trust issues, they can learn from others who faced the same thing. The site promotes responsible ownership, like spaying and neutering, to cut down on stray animals. Through these efforts, it not only informs but also inspires better practices. In short, the mission is about building stronger bonds between humans and their pets while making care less overwhelming.
Will You Check This Article: The Complete Vegg List: Your Guide to Vegetables for Better Meals
Key Features of Petdardas Com
Petdardas com packs in many tools to help with pet needs. One standout part is the search bar that lets you type in symptoms or questions for quick results. There are also quizzes to match you with the best pet type or diet plan. The site updates weekly with new posts on topics like seasonal allergies or holiday safety. Users can save favorites or get email alerts for fresh content. These features make it easy to stay informed without spending hours looking around.
Comprehensive Health Guides on Petdardas Com
Health sections on petdardas com cover everything from common colds to serious conditions like diabetes in cats. Each guide explains symptoms, causes, and treatments in plain terms. For dogs with joint pain, you’ll find info on supplements, exercises, and when to see a vet. The site stresses preventive steps, such as vaccinations and flea control, to avoid bigger issues. Real examples from users add value, showing how advice worked in practice. This depth helps owners feel confident in handling health matters at home while knowing when professional help is needed.
Petdardas com includes breed-specific health tips too. For example, bulldogs often have breathing problems, so there are tailored plans to manage that. Nutrition plays a big role, with charts on portion sizes and ingredient lists to avoid. If your pet is overweight, guides offer safe weight loss methods without harsh diets. All this info comes with links to studies for those who want more proof. By covering both general and specific health, the site acts as a first stop for concerns, saving time and worry.
Training and Behavior Tips from Petdardas Com
Training resources on petdardas com make teaching your pet straightforward. They break down methods like positive reinforcement, where treats reward good actions. For puppies learning to walk on a leash, step-by-step videos show how to start slow and build up. The site addresses common issues like barking too much or scratching furniture, with fixes that fit different home setups. Tips come from certified trainers, ensuring they’re safe and effective.
Behavior parts dig into why pets act out, like anxiety from being alone. Petdardas com suggests tools such as puzzle toys or calming scents to help. For cats that hide a lot, advice includes creating safe spaces and slow introductions to new people. Users can share their success stories in comments, adding real-world proof. This section helps turn challenging behaviors into manageable ones, strengthening the pet-owner relationship. It’s especially useful for first-time owners who might feel lost.
Product Reviews and Recommendations at Petdardas Com
Petdardas com helps sort through countless products with honest reviews. They test items like leashes, beds, and foods, rating them on durability, price, and pet approval. For dry dog food, reviews list pros like joint support ingredients and cons like high cost. The site groups picks by budget or need, such as eco-friendly toys or hypoallergenic shampoos. This saves money by pointing to worthwhile buys and avoiding duds.
Recommendations factor in user feedback too. If many say a collar chafes, it’s noted clearly. Petdardas com partners with brands but keeps reviews fair. For exotic pets, you’ll find niche items like heat lamps for reptiles. Each review includes alternatives if the main one doesn’t fit. This feature turns shopping from guesswork into informed choices, helping owners get the best for their pets without overspending.
How to Get Started with Petdardas Com
Starting on petdardas com is easy and free. Just visit the site and browse categories like health or training. Sign up for an account to join forums or save articles. New users can take a quiz to get personalized suggestions based on their pet’s type and age. Search for specific topics, like “puppy teething tips,” to find targeted help. The mobile-friendly design means you can check it on your phone during walks or vet waits.
To make the most of it, set up email updates for new content. Join discussions to ask questions and get answers from experts or other owners. Petdardas com has tutorials on using features, like uploading pet photos for advice. Track your pet’s progress with printable charts from the site. By engaging regularly, you’ll build a routine that keeps your pet’s care on point. It’s designed for busy people, so even short visits provide value.
Benefits of Joining the Petdardas Com Community
Being part of petdardas com means access to a supportive group. Forums let you connect with others facing similar challenges, like potty training a stubborn pup. This reduces isolation and offers fresh ideas. The site hosts live Q&A sessions with vets, giving direct answers. Members often share deals on products or local events, adding extra perks.
Community features build knowledge through shared experiences. For example, reading about someone’s journey with an aging cat can prepare you for similar situations. Petdardas com moderates talks to keep them positive and helpful. Over time, this creates lasting friendships and a network for advice anytime. The benefit is a more confident approach to pet care, backed by collective wisdom.
Real User Experiences with Petdardas Com
Many users praise petdardas com for changing how they care for their animals. One dog owner shared how health guides helped spot an allergy early, avoiding a big vet bill. A cat lover used training tips to stop nighttime meowing, leading to better sleep for everyone. These stories highlight the site’s practical impact.
Testimonials often mention the friendly community. A new reptile keeper got setup advice that made their lizard thrive. Petdardas com features these on the site to inspire others. Users note the info’s accuracy, with few mistakes compared to general searches. Overall, experiences show it as a reliable ally in pet ownership.
Future Updates for Petdardas Com
Petdardas com plans to add more interactive tools, like app integration for tracking pet health stats. They’ll expand video content with live demos on grooming. Partnerships with shelters could bring more adoption listings. The team aims to cover more pet types, including fish and horses.
User input drives changes, with surveys for feedback. Upcoming features include personalized meal planners and virtual vet chats. These will keep the site fresh and useful. By growing this way, petdardas com stays ahead in helping pet owners.
In summary, petdardas com serves as a key tool for anyone with pets. It combines info, community, and resources to simplify care. Whether you’re starting out or have years of experience, the site offers something valuable. Check it out to see how it can improve your pet’s life today.
Share this content:

Start with this vegg list to make smart choices in the kitchen. Vegetables offer key nutrients that support good health. This post covers a full vegg list, from types to tips. You will find clear info on picking, storing, and using them. Whether you shop for family meals or plan a garden, this guide helps. It answers common questions and gives practical advice. Read on to build your own vegg list and enjoy fresh produce every day.
What is a Vegg List?
A vegg list is a simple tool that names different vegetables. It helps people track what to buy or grow. Many use it for meal planning or to try new options. For example, it can include items like carrots, spinach, and tomatoes. This list reminds you of seasonal picks and nutrient-rich choices. It prevents waste by focusing on what you need. Beginners find it useful to learn about veggies they might skip. Experts use it to vary their diet. Overall, a vegg list makes eating healthy easier and more fun. It turns shopping into a quick task with purpose.
Creating a vegg list starts with your needs. Think about family size, tastes, and budget. List basics first, like onions and potatoes, which last long. Add colors for variety, such as red peppers or green broccoli. Check for allergies or preferences. Include amounts, like two heads of lettuce per week. Update it based on sales or harvests. This keeps costs low and meals fresh. A good vegg list saves time at the store. It also encourages balanced plates with half veggies. In time, it becomes a habit that boosts your well-being.
Benefits of Using a Vegg List
A vegg list promotes better nutrition. Vegetables provide vitamins, minerals, and fiber. For instance, leafy greens like kale give vitamin K for bone health. Root veggies such as beets offer iron to fight tiredness. Regular use of a vegg list ensures you get these daily. It reduces the chance of missing key foods. Studies show people with lists eat more produce. This leads to stronger immunity and steady energy. Plus, it helps control weight by filling you up with low-calorie options. In short, a vegg list is a step toward lasting health gains.
Shopping becomes smarter with a vegg list. It cuts impulse buys and saves money. Focus on in-season items like summer squash or winter cabbage for lower prices. The list guides you to bulk buys for staples. It also minimizes food spoilage by matching amounts to your use. Families report less waste when using lists. Markets often have deals on list items. Over months, this adds up to big savings. A vegg list turns errands into efficient trips. You leave with exactly what supports your meals.
A vegg list sparks creativity in cooking. It introduces new veggies like fennel or okra. Try roasting them or adding to soups. This breaks routine and excites taste buds. Kids might try more when involved in the list. Recipes based on the list use what you have. For example, mix carrots and peas in a stir-fry. It builds skills over time. Home cooks gain confidence with varied ingredients. A vegg list transforms basic meals into flavorful ones. It keeps dining interesting without extra effort.
How to Create Your Own Vegg List
Begin by noting your favorites. Write down veggies you eat often, like cucumbers or beans. This forms the base of your vegg list. Next, add new ones to try, such as artichokes or radishes. Research quick facts on each for motivation. Consider storage life; pick hardy ones like carrots for longer keep. Balance the list with different types for full nutrition. Use apps or notebooks to organize it. Review weekly to adjust for changes. This method makes your vegg list personal and effective. It grows with your habits.
Group items by category in your vegg list. Separate leafy, root, and fruit veggies. This setup aids shopping in store sections. For each, note quantities based on recipes. If you cook stir-fries, add more bell peppers. Factor in prep time; choose easy ones like cherry tomatoes. Include notes on washing or cutting. Share the list with others for input. Digital tools let you sort and search fast. A grouped vegg list streamlines planning. It ensures nothing gets forgotten.
Update your vegg list often. Check what worked last time and tweak. If broccoli went bad, buy less next. Add seasonal swaps, like zucchini in summer. Track prices to spot patterns. Use feedback from meals to refine choices. For health goals, prioritize low-sugar options like celery. Set reminders to revise monthly. This keeps the vegg list relevant. It adapts to life changes, like new diets. A fresh list maintains interest in veggies.
Will You Check This Article: Insoya: Your Complete Guide to This Innovative Plant-Based Protein
Categories of Vegetables in the Vegg List
Vegetables fall into groups based on plant parts. This helps in your vegg list. Leafy ones come from leaves, roots from underground. Each group has unique traits and uses. Knowing them aids in balanced meals. For example, mix a leafy with a root for texture. Categories guide storage too; some need cold, others room temp. They influence cooking methods. A vegg list by category makes selection simple. It covers all needs without gaps.
Leafy Greens in the Vegg List
Leafy greens top many vegg lists for their nutrients. Spinach, lettuce, and kale are common. They pack vitamin A for eye health and folate for cell growth. Eat them raw in salads or cooked in stir-fries. Wash well to remove dirt. Store in the fridge for up to a week. Choose fresh bunches without wilt. These veggies add crunch and color. They help with digestion due to high fiber. Include two or three in your weekly vegg list. Pair with dressings for taste. They suit quick meals.
More options in leafy greens expand your vegg list. Try arugula for a peppery kick or swiss chard for mild flavor. Both offer calcium for bones. Steam or sauté them. Avoid overcooking to keep vitamins. Buy organic if possible to cut pesticides. These greens work in smoothies too. They boost iron levels, aiding energy. Rotate types to prevent boredom. A vegg list with variety ensures steady intake. They fit vegan or low-carb plans.
Root Vegetables in the Vegg List
Root veggies anchor a solid vegg list. Carrots, beets, and potatoes store energy underground. They give carbs for fuel and antioxidants for cell protection. Roast them for sweetness or boil for soups. Scrub skins before use. Keep in cool, dark spots for months. Select firm ones without soft areas. These add heartiness to dishes. They support gut health with fiber. Aim for a few in each vegg list. Grate raw for salads.
Expand with turnips or radishes in your vegg list. Turnips bring mild spice, radishes add crispness. Both provide vitamin C for skin. Bake or pickle them. Check for freshness by feel. These roots suit cold weather meals. They help with blood pressure control. Mix in stews for depth. A diverse vegg list includes them for balance. They store well, reducing trips.
Bulb Vegetables in the Vegg List
Bulb veggies like onions and garlic flavor your vegg list. They grow as layered bulbs. Rich in sulfur for heart benefits and allicin for immunity. Chop for bases in cooking. Store dry and away from light. Pick heavy bulbs without sprouts. These enhance any meal. They fight inflammation. Include basics in every vegg list. Mince fine for even taste.
Add fennel or leeks to the bulb section of your vegg list. Fennel offers licorice notes, leeks mild onion taste. Both supply potassium for muscles. Slice thin for salads or braise. Avoid wilted stalks. These add aroma to stocks. They aid digestion. Use in diverse cuisines. Your vegg list gains versatility with them.
Stem Vegetables in the Vegg List
Stem veggies such as celery and asparagus build a vegg list. They come from plant stalks. Provide crunch and low calories. Celery has water for hydration, asparagus folate for mood. Eat raw with dips or grill. Trim ends before use. Refrigerate wrapped for crispness. Choose straight stems. They refresh snacks. Support kidney function. Stock up in your vegg list.
Include rhubarb or kohlrabi in stem choices for your vegg list. Rhubarb tarts up pies, kohlrabi crunches like apple. Both offer fiber for fullness. Cook rhubarb to soften. Peel kohlrabi. These suit unique recipes. They boost vitamin intake. Experiment in meals. A vegg list with stems adds texture.
Flower Vegetables in the Vegg List
Flower veggies like broccoli and cauliflower star in a vegg list. They form buds. Loaded with vitamin C for healing and sulforaphane for detox. Steam to keep firm or roast for char. Cut florets even. Store cold for a week. Select tight heads. These fill plates. They protect cells. Feature them often.
Try artichokes or broccolini in your flower vegg list. Artichokes heart tender, broccolini slim. Both give antioxidants. Boil artichokes, stir-fry broccolini. Trim leaves. These impress guests. Aid liver health. Your list evolves with them.
Seasonal Vegg List Ideas
Seasons shape a smart vegg list. Spring brings asparagus and peas for light dishes. Summer offers tomatoes and corn for salads. Fall has squash and pumpkins for warmth. Winter roots like parsnips hold up in roasts. This approach saves money and boosts flavor. Local farms supply fresh picks. Adjust your vegg list quarterly. It connects you to nature’s cycle. Meals taste better with timely choices.
In spring, focus on greens in your vegg list. Radishes and lettuce grow fast. They add snap to wraps. Peas provide protein. Grill asparagus for sides. These keep light after winter. They refresh energy. A seasonal vegg list aligns with body needs.
Summer vegg list highlights fruits like zucchini and peppers. Grill or stuff them. Berries count as treats, but focus veggies. Cucumbers hydrate. This keeps cool in heat. Variety prevents repeat. Your list stays exciting.
Nutritional Highlights from the Vegg List
Vegetables in a vegg list deliver key vitamins. Vitamin C in peppers aids iron take-up. Potassium in potatoes balances fluids. Each type contributes. Mix for full coverage. Track intake with your list. This prevents shortages. A balanced vegg list supports daily function.
Fiber stands out in a vegg list. Beans and broccoli move food through. This eases bowels and curbs hunger. Aim for 25 grams daily. Veggies help reach it. Your list ensures steady supply. It promotes gut balance.
Antioxidants protect in a vegg list. Beets fight damage with betalains. Greens shield with lutein. These lower disease risk. Include colorful ones. Your vegg list becomes a shield.
Tips for Incorporating the Vegg List into Your Diet
Start small with your vegg list. Add one new veggie weekly. Try it in familiar ways, like carrots in soup. This builds habit without overwhelm. Track reactions for likes. Your list guides progress. Meals improve step by step.
Pair veggies from the vegg list in recipes. Mix spinach with eggs or beans with rice. This boosts fullness. Use herbs for flavor. Simple changes add up. Your diet shifts naturally.
Store right to use your vegg list fully. Keep roots dry, greens moist. This extends life. Plan meals around short-shelf items first. Less waste means more value. Your vegg list works better.
In summary, a vegg list is a key tool for healthy habits. It organizes choices and inspires meals. Use this guide to start yours today. Enjoy the gains in energy and taste. Keep it handy for ongoing success.
Share this content:
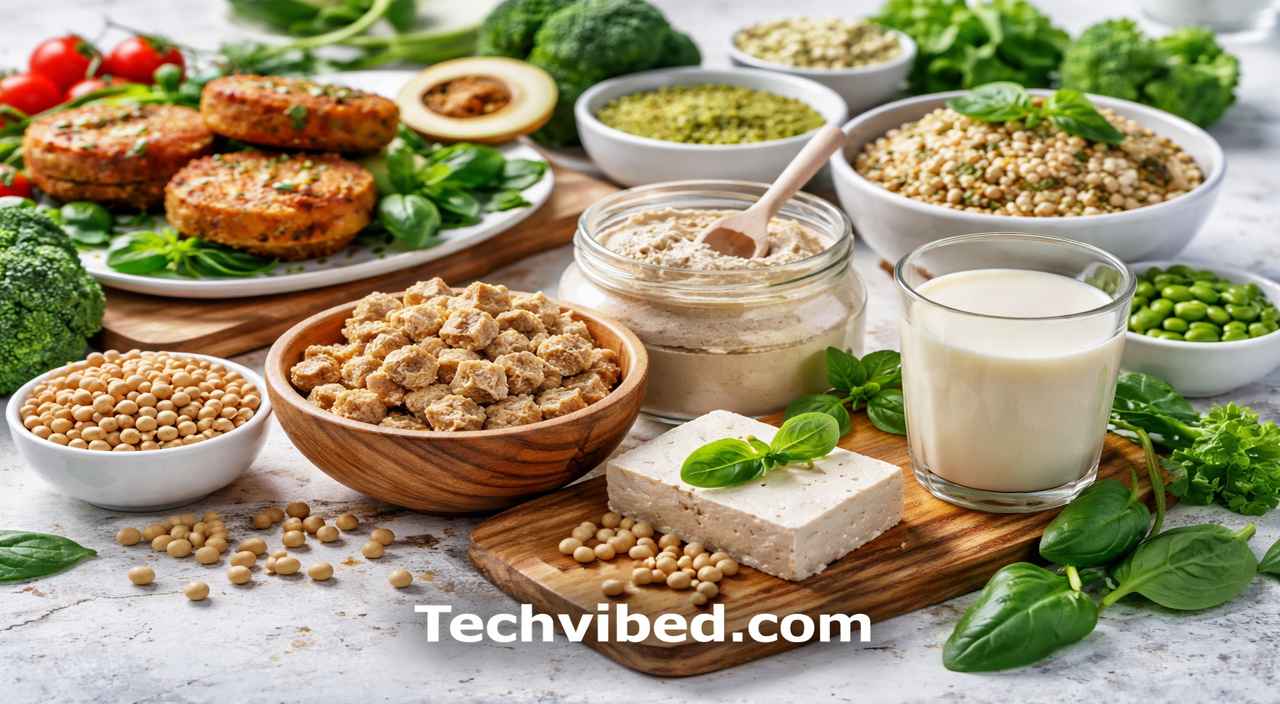
Insoya stands out as a fresh twist on soy that fits right into today’s focus on healthy eating and green living. It takes the best parts of soy and boosts them with new methods to make it easier to digest and more packed with goodness. People turn to insoya for its role in plant-based diets, offering a solid protein source without the downsides of animal products. This guide covers everything from what insoya is to how you can add it to your meals, giving you all the facts to make smart choices. Whether you’re new to plant-based options or looking to switch things up, insoya could be a great fit for your routine.
What is Insoya?
Insoya refers to an upgraded form of soy protein that uses advanced techniques like fermentation and added nutrients to improve on regular soy. It comes from non-GMO soybeans and gets processed to cut down on things that can cause stomach issues, such as anti-nutrients. This makes insoya a complete protein with all the amino acids your body needs, much like meat or eggs, but from plants. Brands often add vitamins like B12 and iron to fill common gaps in vegan diets. In short, insoya is soy made better for modern needs, focusing on taste, health, and ease of use.
Unlike basic soy products like tofu or soy milk, insoya goes through extra steps to boost its value. For example, fermentation brings in probiotics that help your gut, while fortification adds key minerals. This results in products that absorb better into your body, giving you more bang for your buck. Insoya appears in forms such as powders, bars, and textured proteins, making it simple to swap into everyday foods. It’s not just a trend; it’s a practical choice for anyone wanting reliable plant protein without extra hassle or waste.
How Insoya is Produced
The process starts with growing soybeans on farms that follow green practices, avoiding harsh chemicals to keep the soil healthy. Farmers pick non-GMO types and harvest them at the right time for top quality. Then, the beans get cleaned, soaked in water to soften, and ground into a paste. Heat and pressure pull out the protein, and advanced methods like fermentation with special bacteria make it easier to digest. This step also cuts down on unwanted flavors and adds helpful microbes.
After that, makers enrich insoya with nutrients like omega-3s or calcium to make it more complete. They use techniques such as enzyme treatment to break down tough parts, improving how your body takes in the goodness. The final products get dried or shaped into powders, chunks, or ready items, with a focus on low waste. Packaging often uses recyclable materials to support the eco-friendly side. This careful production ensures insoya stays fresh, safe, and ready for your kitchen or gym bag.
History and Evolution of Insoya
Soy has been around for thousands of years, starting in places like China and Japan where people ate it as tofu, miso, or tempeh. It played a big part in daily meals and even cultural events. As trade spread, soy reached other parts of the world, becoming a key crop for food and feed. In recent times, with more folks choosing plant-based eats, experts saw room to improve soy’s downsides like hard digestion or plain taste. That’s where insoya came in, building on old traditions with new science.
Insoya grew from research in food labs and startups aiming to fix soy’s issues. By the 2020s, teams used fermentation and tech to make soy more appealing. This shift answered calls for sustainable proteins as animal farming’s impact became clear. Insoya blends ancient soy wisdom with tools like probiotic strains and biofortification. Today, it’s part of a bigger move toward functional foods that do more than fill you up—they support your health and the planet too.
Will You Check This Article: The Complete Guide to Aponeyrvsh: Everything You Need to Know
Nutritional Profile of Insoya
Insoya packs a strong punch with about 52 grams of protein per 100 grams, making it a top pick for building muscle or staying full. It includes all nine essential amino acids, so it’s a full protein source on its own. Low in fat at just 1 gram per serving and free of cholesterol, it fits well for heart-focused diets. Fiber comes in at 13 grams, helping with digestion and keeping blood sugar steady. Many versions add extras like magnesium for energy and calcium for bones.
What sets insoya apart is its boosted absorption thanks to processing. Fermentation breaks down barriers that block nutrient uptake in regular soy, so you get more iron and zinc into your system. Isoflavones act as natural antioxidants, fighting off cell damage. Compared to other plants, insoya offers a balanced mix without needing to combine foods. It’s also often fortified with B12, a must for those skipping animal products. Overall, this profile makes insoya a smart, all-around nutrient provider.
Insoya vs. Traditional Soy
Traditional soy like edamame or tofu gives basic protein but can cause bloating from anti-nutrients. Insoya fixes this with fermentation, cutting those issues by up to 70 percent for smoother digestion. Nutrient-wise, insoya adds vitamins and minerals that plain soy might lack, like omega-3s for brain health. Taste improves too, losing the beany flavor for something milder and easier to mix in recipes. While both are plant-based, insoya feels more modern and user-friendly.
In terms of sustainability, both come from soybeans, but insoya often uses organic farming for cleaner production. Protein yield stays high, but insoya’s enhancements mean you need less to get the same benefits. For athletes, insoya supports quicker recovery due to better peptides. If you’re sensitive to soy, insoya’s refined form might work better. Choosing between them depends on your needs—traditional for simple cooking, insoya for added health perks.
Health Benefits of Insoya
Eating insoya can help your heart by lowering bad cholesterol and keeping blood pressure in check. Its isoflavones work to improve blood flow and cut inflammation, reducing risks for heart problems. Studies show regular intake leads to better lipid levels, especially when replacing animal fats. The low saturated fat content adds to this, making insoya a heart-smart choice for daily meals. Pair it with veggies for even stronger effects.
For bones, insoya’s calcium and magnesium help build density and prevent breaks as you age. Women after menopause find it useful for keeping bones strong without dairy. The added vitamin D in some products aids absorption, fighting off conditions like osteoporosis. Active people benefit too, as it supports joint health during workouts. Including insoya a few times a week can make a real difference in long-term bone care.
Digestive and Gut Health
Insoya promotes good digestion with its fiber and probiotics from fermentation. These help balance your gut bacteria, leading to regular bowel movements and less discomfort. Unlike raw soy, it has fewer lectins and phytates, so nutrients pass through easier without gas or bloating. Users often report feeling lighter after meals. For those with mild gut issues, starting small builds tolerance. It’s a gentle way to boost fiber intake.
The gut-brain link gets a lift from insoya’s microbes, which may improve mood and focus. Regular use can reduce inflammation in the digestive tract, helping with conditions like IBS. Combine it with yogurt alternatives or fermented foods for max benefits. Overall, insoya turns soy into a gut-friendly option that supports your whole body’s balance.
Weight Management and Fitness
Insoya aids weight control by keeping you full longer with its protein and fiber mix. This cuts down on snacking and helps manage calories without feeling hungry. Its low glycemic index keeps blood sugar stable, avoiding crashes that lead to overeating. For fitness fans, it speeds muscle repair after exercise, supporting gains without extra fats. Use it in shakes for quick recovery.
Athletes like insoya for its complete amino acids that build strength and endurance. It fits into meal plans for cutting or bulking, offering versatile options like bars or powders. Women may see hormonal balance, easing cravings during cycles. Start with 25 grams a day and adjust based on activity. Insoya makes staying fit simpler and more sustainable.
Sustainability and Environmental Impact of Insoya
Insoya helps the planet by using less water and land than meat production. Soybeans grow efficiently, yielding more protein per acre while cutting greenhouse gases. Farms for insoya often skip pesticides, protecting soil and wildlife. This choice reduces your carbon footprint with every meal, supporting a cleaner earth. It’s a small step with big results for climate efforts.
By picking insoya, you back fair farming that boosts local economies and food access in needy areas. Its long shelf life means less waste, and packaging focuses on recyclables. Compared to dairy or beef, insoya saves resources and fights deforestation. As demand grows, it pushes for better practices across the food chain, making healthy eating good for everyone.
How to Incorporate Insoya into Your Diet
Adding insoya is easy—start with protein powders in your morning smoothie for a quick boost. Mix it with fruits, nuts, and plant milk for a tasty start. For lunch, use textured insoya in salads or wraps as a meat swap. It takes on flavors well, so season with herbs or spices. Snacks like bars keep energy up without sugar highs. Aim for variety to keep things fresh.
For dinner, try insoya chunks in stir-fries or curries with veggies and rice. Bake with flour for bread or muffins that add nutrition. If you’re baking, replace part of regular flour with insoya for extra protein. Kids can enjoy it in pancakes or yogurt mixes. Track how it feels and adjust portions to suit your body.
Popular Insoya Products
Look for insoya in powders, ideal for shakes and baking. Textured versions work great as ground meat in tacos or pasta. Milk and yogurt options offer dairy-free choices for cereals or sauces. Bars and crisps make handy snacks for busy days. Some brands add flavors like vanilla or chocolate for appeal. Check labels for organic seals.
Flour from insoya boosts baked goods, while granules fit soups or stews. Ready-to-eat items like burgers save time. Supplements in capsules target specific needs like iron. With so many forms, insoya suits any lifestyle, from vegan to flexitarian.
Simple Recipes with Insoya
Try an insoya smoothie: blend one scoop of powder with banana, berries, and almond milk. Add spinach for greens. This takes five minutes and gives protein for the day. For a stir-fry, soak chunks in hot water, then cook with garlic, broccoli, and soy sauce over rice. It serves two and packs veggies. Adjust spices to taste.
Make insoya patties: mix granules with onions, breadcrumbs, and eggs (or flax for vegan), form into shapes, and fry. Serve on buns with lettuce. Brownies get a lift by swapping half the flour with insoya—bake as usual for fudgy treats. These ideas show insoya’s flexibility in sweet or savory dishes.
Potential Side Effects and Considerations
Most people handle insoya well, but soy allergies mean skipping it altogether. Start slow if new to soy, as too much at once might cause mild gas. Those with thyroid issues should watch intake and get enough iodine, since high amounts could affect hormones. Always talk to a doctor if you have conditions. Moderation keeps things safe.
Overdoing insoya might lead to digestive upset, so stick to 25-50 grams daily based on your activity. Pregnant folks or kids can use it, but check with pros for right amounts. Choose non-GMO brands to avoid worries about modified crops. Listening to your body helps spot any rare reactions early.
Common Questions About Insoya
Is insoya safe for everyday use? Yes, in moderate amounts as part of a balanced diet. It provides steady protein without overload. Can it help with diabetes? Its low sugar impact stabilizes levels, making it a good pick—pair with whole foods. Does insoya affect hormones? For most, no; isoflavones can even help balance them. Consult if concerned.
Where to buy insoya? Health stores, online sites like Amazon, or supermarkets carry it. Look for certified organic. Is it better than pea protein? Insoya offers complete aminos and extras like isoflavones, while pea is hypoallergenic—both have places. How does it taste? Mild and versatile, easy to flavor in recipes.
Share this content:

Sosoactive: A Complete Guide to the Platform, Content, and Online Impact

5starstocks.com: A Complete Guide to Features, Benefits, and How It Works

Weber Grillvorführung: A Complete Guide to Live BBQ Demonstrations

Uncuymaza: Understanding the Popular Online Platform and Its Impact

The Complete Guide to XXXXXXXL Size CXX Clothing

Understanding Archivebate: A Complete Guide to the Webcam Archive Platform
-
 Tech News5 months ago
Uncuymaza: Understanding the Popular Online Platform and Its Impact
-
 Lifestyle5 months ago
The Complete Guide to XXXXXXXL Size CXX Clothing
-
 Lifestyle5 months ago
Understanding Archivebate: A Complete Guide to the Webcam Archive Platform
-

 Lifestyle5 months ago
Woodwork Coffee: The Art of Combining Craftsmanship and Your Daily Brew
-

 Lifestyle5 months ago
Witelovers: A Complete Guide to Minimalist Living and Clean Aesthetics
-

 Business5 months ago
Kwasi Kwarteng Net Worth: A Complete Guide
-

 Business5 months ago
PO Box 6887 Coventry: Your Complete Guide to This UK Mailing Address
-

 Health5 months ago
Joguart: What It Is, Benefits, How It’s Made, and How to Use It