
Health
The Complete Vegg List: Your Guide to Vegetables for Better Meals
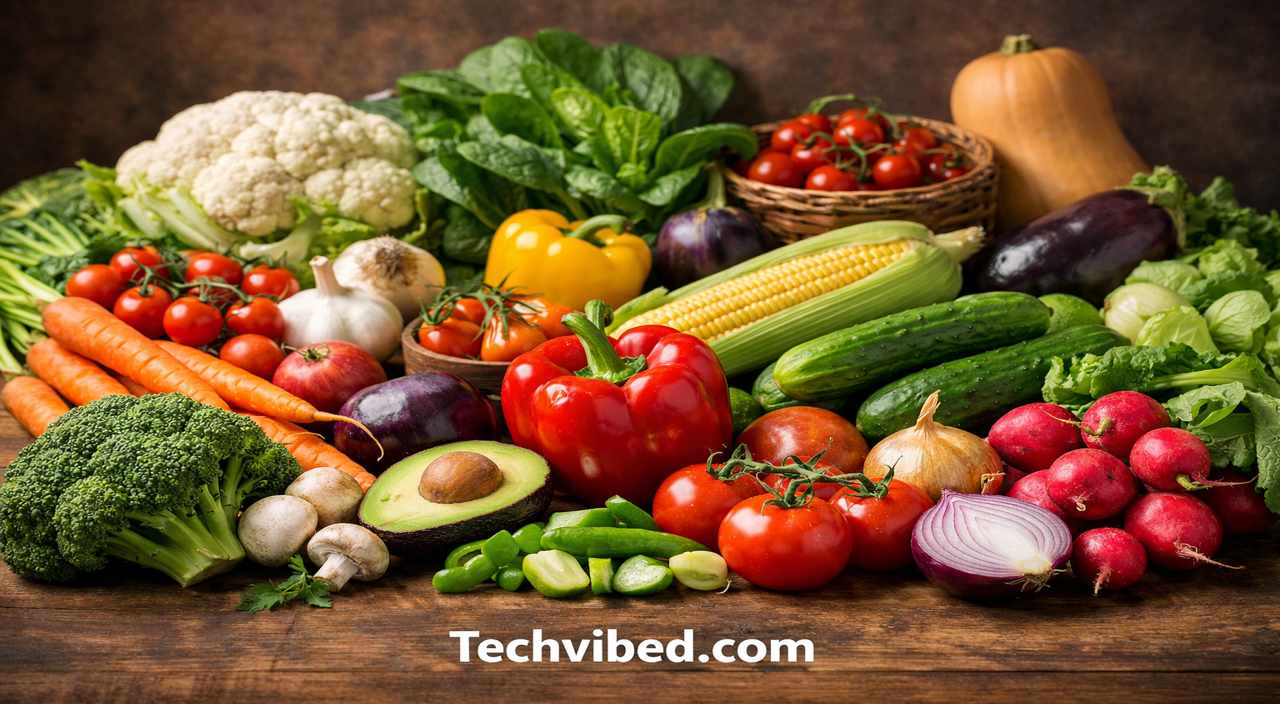
Start with this vegg list to make smart choices in the kitchen. Vegetables offer key nutrients that support good health. This post covers a full vegg list, from types to tips. You will find clear info on picking, storing, and using them. Whether you shop for family meals or plan a garden, this guide helps. It answers common questions and gives practical advice. Read on to build your own vegg list and enjoy fresh produce every day.
What is a Vegg List?
A vegg list is a simple tool that names different vegetables. It helps people track what to buy or grow. Many use it for meal planning or to try new options. For example, it can include items like carrots, spinach, and tomatoes. This list reminds you of seasonal picks and nutrient-rich choices. It prevents waste by focusing on what you need. Beginners find it useful to learn about veggies they might skip. Experts use it to vary their diet. Overall, a vegg list makes eating healthy easier and more fun. It turns shopping into a quick task with purpose.
Creating a vegg list starts with your needs. Think about family size, tastes, and budget. List basics first, like onions and potatoes, which last long. Add colors for variety, such as red peppers or green broccoli. Check for allergies or preferences. Include amounts, like two heads of lettuce per week. Update it based on sales or harvests. This keeps costs low and meals fresh. A good vegg list saves time at the store. It also encourages balanced plates with half veggies. In time, it becomes a habit that boosts your well-being.
Benefits of Using a Vegg List
A vegg list promotes better nutrition. Vegetables provide vitamins, minerals, and fiber. For instance, leafy greens like kale give vitamin K for bone health. Root veggies such as beets offer iron to fight tiredness. Regular use of a vegg list ensures you get these daily. It reduces the chance of missing key foods. Studies show people with lists eat more produce. This leads to stronger immunity and steady energy. Plus, it helps control weight by filling you up with low-calorie options. In short, a vegg list is a step toward lasting health gains.
Shopping becomes smarter with a vegg list. It cuts impulse buys and saves money. Focus on in-season items like summer squash or winter cabbage for lower prices. The list guides you to bulk buys for staples. It also minimizes food spoilage by matching amounts to your use. Families report less waste when using lists. Markets often have deals on list items. Over months, this adds up to big savings. A vegg list turns errands into efficient trips. You leave with exactly what supports your meals.
A vegg list sparks creativity in cooking. It introduces new veggies like fennel or okra. Try roasting them or adding to soups. This breaks routine and excites taste buds. Kids might try more when involved in the list. Recipes based on the list use what you have. For example, mix carrots and peas in a stir-fry. It builds skills over time. Home cooks gain confidence with varied ingredients. A vegg list transforms basic meals into flavorful ones. It keeps dining interesting without extra effort.
How to Create Your Own Vegg List
Begin by noting your favorites. Write down veggies you eat often, like cucumbers or beans. This forms the base of your vegg list. Next, add new ones to try, such as artichokes or radishes. Research quick facts on each for motivation. Consider storage life; pick hardy ones like carrots for longer keep. Balance the list with different types for full nutrition. Use apps or notebooks to organize it. Review weekly to adjust for changes. This method makes your vegg list personal and effective. It grows with your habits.
Group items by category in your vegg list. Separate leafy, root, and fruit veggies. This setup aids shopping in store sections. For each, note quantities based on recipes. If you cook stir-fries, add more bell peppers. Factor in prep time; choose easy ones like cherry tomatoes. Include notes on washing or cutting. Share the list with others for input. Digital tools let you sort and search fast. A grouped vegg list streamlines planning. It ensures nothing gets forgotten.
Update your vegg list often. Check what worked last time and tweak. If broccoli went bad, buy less next. Add seasonal swaps, like zucchini in summer. Track prices to spot patterns. Use feedback from meals to refine choices. For health goals, prioritize low-sugar options like celery. Set reminders to revise monthly. This keeps the vegg list relevant. It adapts to life changes, like new diets. A fresh list maintains interest in veggies.
Will You Check This Article: Insoya: Your Complete Guide to This Innovative Plant-Based Protein
Categories of Vegetables in the Vegg List
Vegetables fall into groups based on plant parts. This helps in your vegg list. Leafy ones come from leaves, roots from underground. Each group has unique traits and uses. Knowing them aids in balanced meals. For example, mix a leafy with a root for texture. Categories guide storage too; some need cold, others room temp. They influence cooking methods. A vegg list by category makes selection simple. It covers all needs without gaps.
Leafy Greens in the Vegg List
Leafy greens top many vegg lists for their nutrients. Spinach, lettuce, and kale are common. They pack vitamin A for eye health and folate for cell growth. Eat them raw in salads or cooked in stir-fries. Wash well to remove dirt. Store in the fridge for up to a week. Choose fresh bunches without wilt. These veggies add crunch and color. They help with digestion due to high fiber. Include two or three in your weekly vegg list. Pair with dressings for taste. They suit quick meals.
More options in leafy greens expand your vegg list. Try arugula for a peppery kick or swiss chard for mild flavor. Both offer calcium for bones. Steam or sauté them. Avoid overcooking to keep vitamins. Buy organic if possible to cut pesticides. These greens work in smoothies too. They boost iron levels, aiding energy. Rotate types to prevent boredom. A vegg list with variety ensures steady intake. They fit vegan or low-carb plans.
Root Vegetables in the Vegg List
Root veggies anchor a solid vegg list. Carrots, beets, and potatoes store energy underground. They give carbs for fuel and antioxidants for cell protection. Roast them for sweetness or boil for soups. Scrub skins before use. Keep in cool, dark spots for months. Select firm ones without soft areas. These add heartiness to dishes. They support gut health with fiber. Aim for a few in each vegg list. Grate raw for salads.
Expand with turnips or radishes in your vegg list. Turnips bring mild spice, radishes add crispness. Both provide vitamin C for skin. Bake or pickle them. Check for freshness by feel. These roots suit cold weather meals. They help with blood pressure control. Mix in stews for depth. A diverse vegg list includes them for balance. They store well, reducing trips.
Bulb Vegetables in the Vegg List
Bulb veggies like onions and garlic flavor your vegg list. They grow as layered bulbs. Rich in sulfur for heart benefits and allicin for immunity. Chop for bases in cooking. Store dry and away from light. Pick heavy bulbs without sprouts. These enhance any meal. They fight inflammation. Include basics in every vegg list. Mince fine for even taste.
Add fennel or leeks to the bulb section of your vegg list. Fennel offers licorice notes, leeks mild onion taste. Both supply potassium for muscles. Slice thin for salads or braise. Avoid wilted stalks. These add aroma to stocks. They aid digestion. Use in diverse cuisines. Your vegg list gains versatility with them.
Stem Vegetables in the Vegg List
Stem veggies such as celery and asparagus build a vegg list. They come from plant stalks. Provide crunch and low calories. Celery has water for hydration, asparagus folate for mood. Eat raw with dips or grill. Trim ends before use. Refrigerate wrapped for crispness. Choose straight stems. They refresh snacks. Support kidney function. Stock up in your vegg list.
Include rhubarb or kohlrabi in stem choices for your vegg list. Rhubarb tarts up pies, kohlrabi crunches like apple. Both offer fiber for fullness. Cook rhubarb to soften. Peel kohlrabi. These suit unique recipes. They boost vitamin intake. Experiment in meals. A vegg list with stems adds texture.
Flower Vegetables in the Vegg List
Flower veggies like broccoli and cauliflower star in a vegg list. They form buds. Loaded with vitamin C for healing and sulforaphane for detox. Steam to keep firm or roast for char. Cut florets even. Store cold for a week. Select tight heads. These fill plates. They protect cells. Feature them often.
Try artichokes or broccolini in your flower vegg list. Artichokes heart tender, broccolini slim. Both give antioxidants. Boil artichokes, stir-fry broccolini. Trim leaves. These impress guests. Aid liver health. Your list evolves with them.
Seasonal Vegg List Ideas
Seasons shape a smart vegg list. Spring brings asparagus and peas for light dishes. Summer offers tomatoes and corn for salads. Fall has squash and pumpkins for warmth. Winter roots like parsnips hold up in roasts. This approach saves money and boosts flavor. Local farms supply fresh picks. Adjust your vegg list quarterly. It connects you to nature’s cycle. Meals taste better with timely choices.
In spring, focus on greens in your vegg list. Radishes and lettuce grow fast. They add snap to wraps. Peas provide protein. Grill asparagus for sides. These keep light after winter. They refresh energy. A seasonal vegg list aligns with body needs.
Summer vegg list highlights fruits like zucchini and peppers. Grill or stuff them. Berries count as treats, but focus veggies. Cucumbers hydrate. This keeps cool in heat. Variety prevents repeat. Your list stays exciting.
Nutritional Highlights from the Vegg List
Vegetables in a vegg list deliver key vitamins. Vitamin C in peppers aids iron take-up. Potassium in potatoes balances fluids. Each type contributes. Mix for full coverage. Track intake with your list. This prevents shortages. A balanced vegg list supports daily function.
Fiber stands out in a vegg list. Beans and broccoli move food through. This eases bowels and curbs hunger. Aim for 25 grams daily. Veggies help reach it. Your list ensures steady supply. It promotes gut balance.
Antioxidants protect in a vegg list. Beets fight damage with betalains. Greens shield with lutein. These lower disease risk. Include colorful ones. Your vegg list becomes a shield.
Tips for Incorporating the Vegg List into Your Diet
Start small with your vegg list. Add one new veggie weekly. Try it in familiar ways, like carrots in soup. This builds habit without overwhelm. Track reactions for likes. Your list guides progress. Meals improve step by step.
Pair veggies from the vegg list in recipes. Mix spinach with eggs or beans with rice. This boosts fullness. Use herbs for flavor. Simple changes add up. Your diet shifts naturally.
Store right to use your vegg list fully. Keep roots dry, greens moist. This extends life. Plan meals around short-shelf items first. Less waste means more value. Your vegg list works better.
In summary, a vegg list is a key tool for healthy habits. It organizes choices and inspires meals. Use this guide to start yours today. Enjoy the gains in energy and taste. Keep it handy for ongoing success.
Share this content:
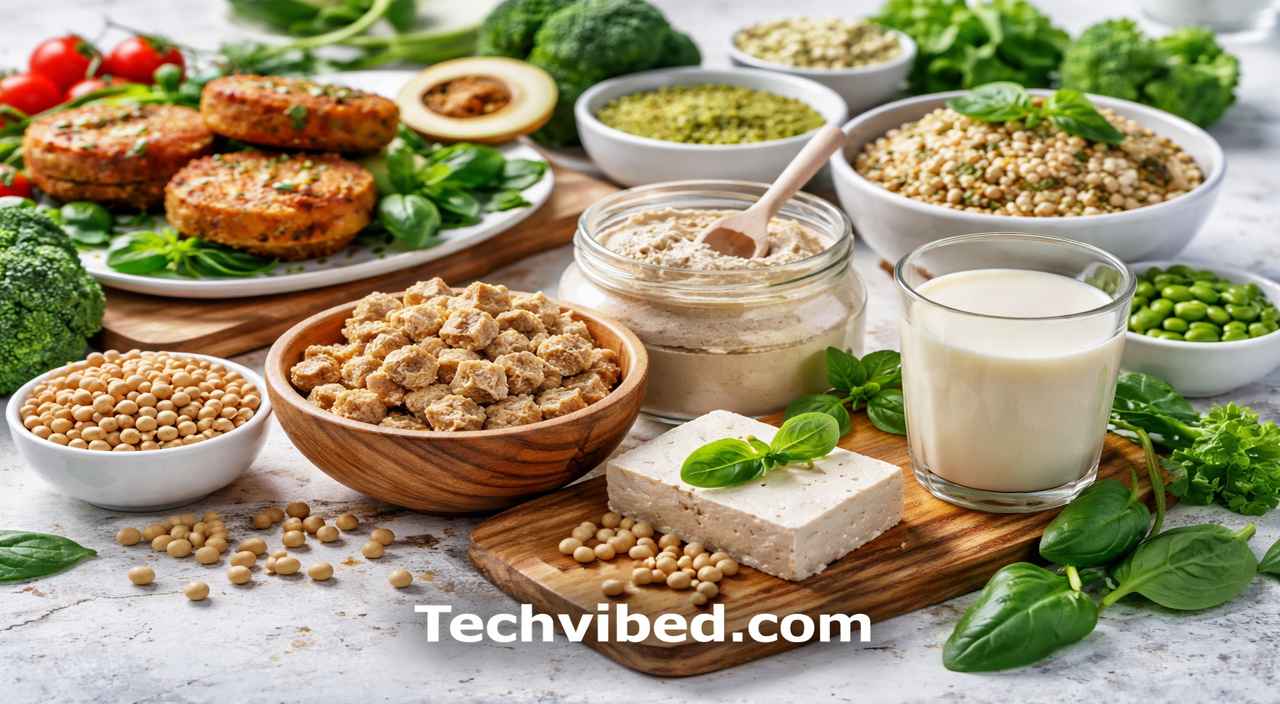
Insoya stands out as a fresh twist on soy that fits right into today’s focus on healthy eating and green living. It takes the best parts of soy and boosts them with new methods to make it easier to digest and more packed with goodness. People turn to insoya for its role in plant-based diets, offering a solid protein source without the downsides of animal products. This guide covers everything from what insoya is to how you can add it to your meals, giving you all the facts to make smart choices. Whether you’re new to plant-based options or looking to switch things up, insoya could be a great fit for your routine.
What is Insoya?
Insoya refers to an upgraded form of soy protein that uses advanced techniques like fermentation and added nutrients to improve on regular soy. It comes from non-GMO soybeans and gets processed to cut down on things that can cause stomach issues, such as anti-nutrients. This makes insoya a complete protein with all the amino acids your body needs, much like meat or eggs, but from plants. Brands often add vitamins like B12 and iron to fill common gaps in vegan diets. In short, insoya is soy made better for modern needs, focusing on taste, health, and ease of use.
Unlike basic soy products like tofu or soy milk, insoya goes through extra steps to boost its value. For example, fermentation brings in probiotics that help your gut, while fortification adds key minerals. This results in products that absorb better into your body, giving you more bang for your buck. Insoya appears in forms such as powders, bars, and textured proteins, making it simple to swap into everyday foods. It’s not just a trend; it’s a practical choice for anyone wanting reliable plant protein without extra hassle or waste.
How Insoya is Produced
The process starts with growing soybeans on farms that follow green practices, avoiding harsh chemicals to keep the soil healthy. Farmers pick non-GMO types and harvest them at the right time for top quality. Then, the beans get cleaned, soaked in water to soften, and ground into a paste. Heat and pressure pull out the protein, and advanced methods like fermentation with special bacteria make it easier to digest. This step also cuts down on unwanted flavors and adds helpful microbes.
After that, makers enrich insoya with nutrients like omega-3s or calcium to make it more complete. They use techniques such as enzyme treatment to break down tough parts, improving how your body takes in the goodness. The final products get dried or shaped into powders, chunks, or ready items, with a focus on low waste. Packaging often uses recyclable materials to support the eco-friendly side. This careful production ensures insoya stays fresh, safe, and ready for your kitchen or gym bag.
History and Evolution of Insoya
Soy has been around for thousands of years, starting in places like China and Japan where people ate it as tofu, miso, or tempeh. It played a big part in daily meals and even cultural events. As trade spread, soy reached other parts of the world, becoming a key crop for food and feed. In recent times, with more folks choosing plant-based eats, experts saw room to improve soy’s downsides like hard digestion or plain taste. That’s where insoya came in, building on old traditions with new science.
Insoya grew from research in food labs and startups aiming to fix soy’s issues. By the 2020s, teams used fermentation and tech to make soy more appealing. This shift answered calls for sustainable proteins as animal farming’s impact became clear. Insoya blends ancient soy wisdom with tools like probiotic strains and biofortification. Today, it’s part of a bigger move toward functional foods that do more than fill you up—they support your health and the planet too.
Will You Check This Article: The Complete Guide to Aponeyrvsh: Everything You Need to Know
Nutritional Profile of Insoya
Insoya packs a strong punch with about 52 grams of protein per 100 grams, making it a top pick for building muscle or staying full. It includes all nine essential amino acids, so it’s a full protein source on its own. Low in fat at just 1 gram per serving and free of cholesterol, it fits well for heart-focused diets. Fiber comes in at 13 grams, helping with digestion and keeping blood sugar steady. Many versions add extras like magnesium for energy and calcium for bones.
What sets insoya apart is its boosted absorption thanks to processing. Fermentation breaks down barriers that block nutrient uptake in regular soy, so you get more iron and zinc into your system. Isoflavones act as natural antioxidants, fighting off cell damage. Compared to other plants, insoya offers a balanced mix without needing to combine foods. It’s also often fortified with B12, a must for those skipping animal products. Overall, this profile makes insoya a smart, all-around nutrient provider.
Insoya vs. Traditional Soy
Traditional soy like edamame or tofu gives basic protein but can cause bloating from anti-nutrients. Insoya fixes this with fermentation, cutting those issues by up to 70 percent for smoother digestion. Nutrient-wise, insoya adds vitamins and minerals that plain soy might lack, like omega-3s for brain health. Taste improves too, losing the beany flavor for something milder and easier to mix in recipes. While both are plant-based, insoya feels more modern and user-friendly.
In terms of sustainability, both come from soybeans, but insoya often uses organic farming for cleaner production. Protein yield stays high, but insoya’s enhancements mean you need less to get the same benefits. For athletes, insoya supports quicker recovery due to better peptides. If you’re sensitive to soy, insoya’s refined form might work better. Choosing between them depends on your needs—traditional for simple cooking, insoya for added health perks.
Health Benefits of Insoya
Eating insoya can help your heart by lowering bad cholesterol and keeping blood pressure in check. Its isoflavones work to improve blood flow and cut inflammation, reducing risks for heart problems. Studies show regular intake leads to better lipid levels, especially when replacing animal fats. The low saturated fat content adds to this, making insoya a heart-smart choice for daily meals. Pair it with veggies for even stronger effects.
For bones, insoya’s calcium and magnesium help build density and prevent breaks as you age. Women after menopause find it useful for keeping bones strong without dairy. The added vitamin D in some products aids absorption, fighting off conditions like osteoporosis. Active people benefit too, as it supports joint health during workouts. Including insoya a few times a week can make a real difference in long-term bone care.
Digestive and Gut Health
Insoya promotes good digestion with its fiber and probiotics from fermentation. These help balance your gut bacteria, leading to regular bowel movements and less discomfort. Unlike raw soy, it has fewer lectins and phytates, so nutrients pass through easier without gas or bloating. Users often report feeling lighter after meals. For those with mild gut issues, starting small builds tolerance. It’s a gentle way to boost fiber intake.
The gut-brain link gets a lift from insoya’s microbes, which may improve mood and focus. Regular use can reduce inflammation in the digestive tract, helping with conditions like IBS. Combine it with yogurt alternatives or fermented foods for max benefits. Overall, insoya turns soy into a gut-friendly option that supports your whole body’s balance.
Weight Management and Fitness
Insoya aids weight control by keeping you full longer with its protein and fiber mix. This cuts down on snacking and helps manage calories without feeling hungry. Its low glycemic index keeps blood sugar stable, avoiding crashes that lead to overeating. For fitness fans, it speeds muscle repair after exercise, supporting gains without extra fats. Use it in shakes for quick recovery.
Athletes like insoya for its complete amino acids that build strength and endurance. It fits into meal plans for cutting or bulking, offering versatile options like bars or powders. Women may see hormonal balance, easing cravings during cycles. Start with 25 grams a day and adjust based on activity. Insoya makes staying fit simpler and more sustainable.
Sustainability and Environmental Impact of Insoya
Insoya helps the planet by using less water and land than meat production. Soybeans grow efficiently, yielding more protein per acre while cutting greenhouse gases. Farms for insoya often skip pesticides, protecting soil and wildlife. This choice reduces your carbon footprint with every meal, supporting a cleaner earth. It’s a small step with big results for climate efforts.
By picking insoya, you back fair farming that boosts local economies and food access in needy areas. Its long shelf life means less waste, and packaging focuses on recyclables. Compared to dairy or beef, insoya saves resources and fights deforestation. As demand grows, it pushes for better practices across the food chain, making healthy eating good for everyone.
How to Incorporate Insoya into Your Diet
Adding insoya is easy—start with protein powders in your morning smoothie for a quick boost. Mix it with fruits, nuts, and plant milk for a tasty start. For lunch, use textured insoya in salads or wraps as a meat swap. It takes on flavors well, so season with herbs or spices. Snacks like bars keep energy up without sugar highs. Aim for variety to keep things fresh.
For dinner, try insoya chunks in stir-fries or curries with veggies and rice. Bake with flour for bread or muffins that add nutrition. If you’re baking, replace part of regular flour with insoya for extra protein. Kids can enjoy it in pancakes or yogurt mixes. Track how it feels and adjust portions to suit your body.
Popular Insoya Products
Look for insoya in powders, ideal for shakes and baking. Textured versions work great as ground meat in tacos or pasta. Milk and yogurt options offer dairy-free choices for cereals or sauces. Bars and crisps make handy snacks for busy days. Some brands add flavors like vanilla or chocolate for appeal. Check labels for organic seals.
Flour from insoya boosts baked goods, while granules fit soups or stews. Ready-to-eat items like burgers save time. Supplements in capsules target specific needs like iron. With so many forms, insoya suits any lifestyle, from vegan to flexitarian.
Simple Recipes with Insoya
Try an insoya smoothie: blend one scoop of powder with banana, berries, and almond milk. Add spinach for greens. This takes five minutes and gives protein for the day. For a stir-fry, soak chunks in hot water, then cook with garlic, broccoli, and soy sauce over rice. It serves two and packs veggies. Adjust spices to taste.
Make insoya patties: mix granules with onions, breadcrumbs, and eggs (or flax for vegan), form into shapes, and fry. Serve on buns with lettuce. Brownies get a lift by swapping half the flour with insoya—bake as usual for fudgy treats. These ideas show insoya’s flexibility in sweet or savory dishes.
Potential Side Effects and Considerations
Most people handle insoya well, but soy allergies mean skipping it altogether. Start slow if new to soy, as too much at once might cause mild gas. Those with thyroid issues should watch intake and get enough iodine, since high amounts could affect hormones. Always talk to a doctor if you have conditions. Moderation keeps things safe.
Overdoing insoya might lead to digestive upset, so stick to 25-50 grams daily based on your activity. Pregnant folks or kids can use it, but check with pros for right amounts. Choose non-GMO brands to avoid worries about modified crops. Listening to your body helps spot any rare reactions early.
Common Questions About Insoya
Is insoya safe for everyday use? Yes, in moderate amounts as part of a balanced diet. It provides steady protein without overload. Can it help with diabetes? Its low sugar impact stabilizes levels, making it a good pick—pair with whole foods. Does insoya affect hormones? For most, no; isoflavones can even help balance them. Consult if concerned.
Where to buy insoya? Health stores, online sites like Amazon, or supermarkets carry it. Look for certified organic. Is it better than pea protein? Insoya offers complete aminos and extras like isoflavones, while pea is hypoallergenic—both have places. How does it taste? Mild and versatile, easy to flavor in recipes.
Share this content:

What is Aponeyrvsh?
Aponeyrvsh is a fun and active way to combine exercise with artistic freedom. It brings together parts of dance, workout routines, and focused breathing to create a full-body experience. People who try aponeyrvsh often find it helps them move better, stand taller, and build muscle through fun patterns of motion. Unlike regular gym sessions, aponeyrvsh lets you add your own touch, making each session feel personal and fresh. It’s not just about getting in shape; it’s a chance to feel happy while moving. Many start aponeyrvsh to mix up their daily routine and end up loving how it boosts their energy. This activity works for all ages and skill levels, as long as you take it step by step.
At its heart, aponeyrvsh uses simple tools to support your body during movements. Think of it as a mix between yoga in the air and light gymnastics. You hang or swing in ways that challenge gravity, which makes your muscles work harder without heavy weights. The goal is to flow through steps that improve how your body parts work together. Beginners might feel awkward at first, but with practice, it becomes smooth and rewarding. Aponeyrvsh stands out because it blends physical effort with mental calm, helping you forget daily worries. It’s growing popular in fitness circles for its unique approach to health.
The History and Origins of Aponeyrvsh
Aponeyrvsh came from mixing old ideas in movement arts with new fitness trends. It draws from dance forms that use rhythm and body control, plus training methods that build power and grace. While exact starting points are hard to pin down, it likely grew from groups experimenting with fun ways to stay fit. Over time, teachers and fans shaped aponeyrvsh into what it is today—a flexible activity that fits modern life. Early versions might have appeared in community classes or online videos, where people shared tips and built on each other’s ideas. This group effort helped aponeyrvsh spread quickly.
As aponeyrvsh gained fans, it moved from small gatherings to bigger events. In recent years, it has picked up speed through social media, where videos show creative routines. This online sharing turned aponeyrvsh into more than a hobby; it became a way for people to connect. Sources trace its rise to a need for activities that are both tough and enjoyable, filling a gap in standard workouts. Today, aponeyrvsh reflects a shift toward exercises that value mind and body equally. Its growth shows how simple concepts can turn into widespread practices when communities get involved.
Will You Check This Article: Understanding the 4 Stages of Appendicitis: A Full Guide to Symptoms, Progression, and Care
Key Features of Aponeyrvsh
One main feature of aponeyrvsh is its focus on tools like straps, lines, and supports that help with balance. These items let you try moves that would be hard on the ground, such as flips or holds. Safety comes first, so good gear is key to avoid slips or strains. Another part is the rhythm—moves often follow beats from music, which makes sessions feel like dancing. This adds fun and helps keep a steady pace. Aponeyrvsh also allows changes for different body types, so you can adjust the height or speed to match your needs.
Personal choice is a big draw in aponeyrvsh. You can pick themes for your routines, like calm flows or fast bursts, based on your mood. This freedom keeps things interesting and stops boredom. Group sessions bring in teamwork, where you learn from others and build bonds. For solo practice, aponeyrvsh offers quiet time to focus inward. Overall, these features make aponeyrvsh stand out as a complete package for fitness and self-expression. It’s designed to grow with you, offering new challenges as you improve.
How to Get Started with Aponeyrvsh
To begin aponeyrvsh, first learn about the basic tools. Look at each item, like the support bands or anchors, and read any guides that come with them. Watch short videos online to see how they fit together. Try setting up in a safe spot at home or outside, and practice simple holds to get comfortable. Ask friends who know aponeyrvsh for advice on common setups. Regular checks on your gear will keep everything in good shape. This step builds confidence before you add more complex moves.
Next, find the right place for aponeyrvsh practice. Pick areas with even ground, like yards or open rooms, to avoid trips. Make sure there’s enough space around you—no low branches or walls nearby. Good lighting helps you see what you’re doing, especially if starting early or late. Weather matters for outdoor sessions; aim for calm days without strong winds. If possible, choose spots near others for quick help if needed. Starting in familiar places makes aponeyrvsh less intimidating and more enjoyable from the start.
Set small targets when learning aponeyrvsh. Begin with easy goals, like holding a position for 10 seconds, then build up. Track your days in a notebook to see progress. Practice a few times a week, not every day, to give your body rest. As you get better, add variety, like new twists or faster speeds. This slow build prevents burnout and lets skills develop naturally. Remember, everyone’s path in aponeyrvsh is different, so focus on your own improvements.
Safety Tips for Aponeyrvsh
Always put on the right protective items before aponeyrvsh, such as head covers and soft pads for joints. These reduce risks from falls or bumps. Check all tools for wear, like frayed parts or loose connections, and fix them right away. Stay alert to what’s around you—clear away rocks or clutter that could cause issues. If doing aponeyrvsh with others, keep space between each person to avoid crashes. Pay attention to how your body feels; stop if you notice sharp pain or dizziness.
Warm up is crucial in aponeyrvsh to prepare muscles. Spend 5-10 minutes stretching arms, legs, and back before starting. This helps blood flow and lowers injury chances. Cool down after with gentle moves to ease tension. Drink water often, especially in warm weather, to stay fresh. Beginners should learn from trained guides to get proper form. Following these steps makes aponeyrvsh safe and lets you enjoy it without worry.
Benefits of Aponeyrvsh for Body and Mind
Aponeyrvsh builds stronger muscles through its pulling and holding actions. Regular practice improves how you stand and move, reducing back issues over time. It also boosts heart health by mixing steady and quick motions, like a full cardio session. Flexibility grows as you reach in new ways, making daily tasks easier. Many notice better control in sports or other activities after starting aponeyrvsh. These physical gains come without needing fancy gyms, just basic tools and space.
On the mind side, aponeyrvsh offers a break from stress. The focus on breathing and flow helps clear thoughts, much like quiet thinking sessions. It builds self-trust as you master new skills, leading to a positive outlook. Group aponeyrvsh creates friendships, fighting feelings of being alone. The sense of success from small wins keeps motivation high. Overall, aponeyrvsh supports both body fitness and mental peace, making it a well-rounded choice for health.
Aponeyrvsh as a Tech and Cultural Tool
Beyond fitness, aponeyrvsh appears in tech fields as a smart system for handling data. It uses learning machines to spot patterns fast, helping companies in areas like health care or money management. For example, it can predict machine breaks in factories or suggest prices in stores. This version of aponeyrvsh saves time and cuts costs by automating hard jobs. Businesses adopt it for quick choices based on fresh info, showing how aponeyrvsh adapts to modern needs.
In culture, aponeyrvsh acts as a flexible idea that people shape together online. It started as a loose thought but grew through shares and changes in groups. This makes aponeyrvsh a sign of how ideas spread today—open and always shifting. Communities use it to talk about change or links between people. Its impact shows in how it encourages fresh views and bonds, turning simple concepts into big talks. Aponeyrvsh highlights the power of shared stories in building trends.
Common Mistakes to Avoid in Aponeyrvsh
A frequent error in aponeyrvsh is rushing into hard moves without basics. This can lead to hurts or lost interest. Instead, spend time on simple steps to build a strong base. Another issue is ignoring tool checks, which risks breaks during use. Always inspect before each session. Comparing yourself to experts online often brings down spirits; remember, they started as beginners too. Focus on your path to keep aponeyrvsh positive.
Poor setup is another pitfall in aponeyrvsh. Make sure anchors are secure and heights fit your size. Skipping warm-ups stiffens muscles, raising strain odds. Overdoing sessions without rest days tires the body, slowing gains. Listen to signals like fatigue and take breaks. By avoiding these, you make aponeyrvsh smoother and more lasting. Learning from slips turns them into useful lessons for better practice.
Advanced Techniques in Aponeyrvsh
Once basics are solid, try advanced aponeyrvsh with combined moves, like twists while swinging. These build on core skills and add thrill. Use music with varying speeds to match your flow, improving timing. Partner work introduces sync, where you mirror or support each other. This level needs good balance and trust. Record sessions to review form and spot areas for tweaks. Advanced aponeyrvsh keeps the activity exciting, pushing limits safely.
Explore themes in advanced aponeyrvsh, such as story-based routines that tell a tale through motion. This adds depth and creativity. Join workshops for new ideas from pros. Experiment with lights or props for visual effects in shows. As you advance, teach others to share knowledge and grow the community. These steps turn aponeyrvsh from a hobby into a passion, offering endless ways to challenge yourself.
The Future of Aponeyrvsh
Aponeyrvsh looks set to grow with new tools and online classes making it easier to learn. Tech like virtual setups could let people practice from home with guides. More events might bring fans together, spreading tips and fun. As health trends favor fun activities, aponeyrvsh could become a go-to choice. Its mix of body and mind work fits future wellness goals. Communities will likely shape its path, adding fresh twists.
In tech, aponeyrvsh systems may get smarter, handling more data for better predictions. This could open uses in new fields like green energy or city planning. Culturally, aponeyrvsh might inspire art or talks on change. Its open nature allows it to fit shifting times. Overall, aponeyrvsh holds promise as a tool for personal growth, business help, and group bonds in years ahead.
Share this content:

Appendicitis is a common medical issue that affects many people each year. It happens when the appendix, a small tube attached to the large intestine, gets inflamed. Knowing the 4 stages of appendicitis can help you spot signs early and get help fast. This guide covers everything from causes to treatment, with clear details to make it easy to follow. If you feel pain in your belly, do not wait—see a doctor right away. This post aims to give you all the facts you need to stay safe.
The appendix sits in the lower right part of your abdomen. When it gets blocked by stool, a foreign object, or infection, it swells and leads to appendicitis. This blockage stops normal flow and lets bacteria build up inside. Over time, this causes more swelling and pain. Appendicitis can hit anyone, but it is most common in people aged 10 to 30. Factors like a family history or certain gut issues can raise your risk. Early action is key because the condition can worsen quickly within 24 to 48 hours.
What Causes Appendicitis?
Appendicitis often starts with a blockage in the appendix. This can come from hard stool pieces called fecaliths, swollen lymph nodes, or even parasites in some cases. Once blocked, mucus builds up, and pressure rises inside the appendix. Bacteria then multiply, causing infection and inflammation. Diet low in fiber might play a role by making stool harder, but experts are not fully sure. Infections from viruses or bacteria in the gut can also trigger it. No one cause fits all, but quick medical care stops it from getting worse.
In rare cases, tumors or injury to the abdomen can lead to appendicitis. But most times, it is due to everyday buildup in the digestive system. People with conditions like cystic fibrosis face higher risks because their mucus is thicker. Smoking or poor gut health might add to the chances too. The good news is that appendicitis is treatable if caught early. Ignoring belly pain can lead to serious problems, so always check with a doctor if symptoms appear.
The 4 Stages of Appendicitis
The 4 stages of appendicitis show how the condition moves from mild to severe. Each stage has its own changes in the appendix and symptoms. Doctors use these stages to decide on treatment. Stage 1 is the start, with basic inflammation. It can progress to stage 2 with pus buildup, then stage 3 where tissue dies, and finally stage 4 with a rupture. Understanding these helps you know when to act. Always seek help at the first sign of trouble.
Progression through the 4 stages of appendicitis usually happens over 24 to 72 hours. Factors like age, health, and how fast bacteria grow affect the speed. Kids and older adults might see faster changes. If treated in early stages, recovery is simple. But later stages need urgent surgery to avoid life-threatening issues. This section breaks down each stage with details on what happens inside the body.
Will You Check This Article: What Is a FUPA? A Complete Guide to Understanding, Causes, and Management
Stage 1: Early Appendicitis
In stage 1 of the 4 stages of appendicitis, the appendix gets blocked and starts to swell. This is called early or simple appendicitis. The lining inside becomes irritated, but there is no pus or tissue damage yet. Pain often begins vaguely around the belly button. It might feel like indigestion at first. Other signs include a slight fever, loss of appetite, and mild nausea. This stage lasts about 4 to 6 hours before moving on if untreated.
At this point, the appendix is still healthy enough for easy treatment. Blood flow is normal, and bacteria have not spread much. Doctors might use antibiotics or watch closely. But surgery is common to remove the risk. If you notice pain that shifts to the lower right side, get checked. Early stage is the best time to act, as it prevents complications. Many people mistake it for a stomach bug, so pay attention to ongoing discomfort.
People in this stage can often walk around, but bending or coughing hurts. The body tries to fight the infection, causing a low-grade fever under 100 degrees. Eating might make nausea worse. Kids might not explain the pain well, so watch for them holding their belly. Adults should note if pain lasts more than a few hours. Quick scans like ultrasound can confirm it early.
Stage 2: Suppurative Appendicitis
Stage 2 in the 4 stages of appendicitis is suppurative, where the appendix fills with pus. The swelling increases, and white blood cells rush in to fight infection. Ulcers might form on the lining. Pain becomes sharper and stays in the lower right abdomen. Fever rises, and you might feel chills or sweat. Nausea turns to vomiting, and heartbeat speeds up. This stage can start 12 to 24 hours after the first signs.
The appendix wall thickens from the pus buildup. Blood flow starts to slow, setting up for worse issues. Treatment here usually means surgery to remove the appendix before it bursts. Antibiotics help control the infection. If you press on the belly, it hurts more when you let go—this is rebound tenderness. Ignoring this stage raises risks. Stay hydrated, but avoid eating until seen by a doctor.
In this phase, the infection is contained but spreading fast. Lab tests show high white blood cells. Imaging like CT scans reveals the swollen appendix. Recovery after surgery is quick, often just a day in the hospital. But delays can push it to stage 3. Watch for signs like trouble passing gas or constipation. These point to gut slowdown from inflammation.
Stage 3: Gangrenous Appendicitis
By stage 3 of the 4 stages of appendicitis, the appendix turns gangrenous. Blood flow cuts off, and tissue begins to die. The wall blackens and weakens. Pain is intense and constant, spreading across the abdomen. High fever over 101 degrees, rapid pulse, and severe vomiting occur. You might look very sick and have a rigid belly. This happens around 24 to 48 hours from the start.
Necrosis makes the appendix fragile and close to rupture. Surgery is urgent to remove it and clean any spread. Antibiotics are given through IV. Without help, toxins build up, causing shock. The smell of dead tissue might be noticed during surgery. Post-op care includes pain meds and monitoring for infection. Early signs like no bowel sounds mean the gut is shutting down.
At this point, complications rise. The dead tissue can lead to abscesses. Older people might not show strong symptoms, making it hard to spot. Blood tests confirm high infection levels. Hospital stay might be longer, up to a week. Rest and light diet aid recovery. Always tell your doctor about all symptoms for accurate diagnosis.
Stage 4: Perforated Appendicitis
Stage 4 in the 4 stages of appendicitis is perforated, when the appendix bursts. Pus and bacteria spill into the abdomen, causing peritonitis. Pain might ease briefly but then worsens everywhere. Fever spikes, and you could go into shock with low blood pressure. Belly swells and hardens. This is a medical emergency, often 48 hours or more after onset.
The rupture spreads infection, leading to abscesses or sepsis. Surgery removes the appendix and washes the area. Strong antibiotics fight the spread. Recovery takes weeks, with possible drains for pus. Scars from infection can cause future bowel issues. Kids and elderly face higher risks. Quick action saves lives—call emergency if pain suddenly changes.
In this stage, symptoms include confusion from toxins. IV fluids and support are needed. Long-term, some need more surgeries for complications. Prevention means early care in prior stages. Track symptoms hourly if you suspect appendicitis.
Symptoms Across the 4 Stages of Appendicitis
Symptoms change as you move through the 4 stages of appendicitis. In stage 1, pain is dull near the navel with mild upset stomach. By stage 2, it sharpens to the right side with fever. Stage 3 brings constant ache, high fever, and weakness. Stage 4 has widespread pain after a burst, with severe illness. Other common signs are constipation, diarrhea, or gas issues. Note how pain moves—it starts central then localizes right.
Women might confuse it with period pain or pregnancy issues. Men often feel it clearly in the abdomen. Kids say tummy hurts and avoid moving. Elderly might only have fatigue. Coughing or walking worsens it in all stages. Keep a symptom log with times to help doctors. Hydrate but skip food if vomiting.
How Appendicitis is Diagnosed
Doctors diagnose appendicitis with history, exam, and tests. They ask about pain start and type. Physical check includes pressing the belly for tenderness. Blood tests look for infection. Urine tests rule out other issues. Imaging like ultrasound or CT shows the swollen appendix. In kids, ultrasound is preferred to avoid radiation. Quick diagnosis prevents progression through the 4 stages of appendicitis.
Sometimes MRI is used for pregnant women. Scores like Alvarado help decide surgery need. If unclear, observation in hospital monitors changes. Accurate diagnosis avoids unneeded surgery. Tell your doctor all details for best results.
Treatment Options for Each Stage
Treatment varies by the 4 stages of appendicitis. In stage 1, antibiotics might work, but surgery is common. Stage 2 needs appendectomy, often laparoscopic for small cuts. Stage 3 requires immediate open surgery if needed. Stage 4 involves cleaning the abdomen plus antibiotics. After surgery, pain relief and rest are key. Most go home in 1-3 days for early stages.
Non-surgical options are rare and only for mild cases. Follow-up checks infection. Eat soft foods post-op. Avoid heavy lifting for weeks.
Complications if Untreated
Untreated appendicitis leads to serious issues. Rupture causes peritonitis, infecting the belly lining. This can turn to sepsis, a body-wide response that drops blood pressure. Abscesses form pockets of pus needing drainage. Scars might block bowels later. In the 4 stages of appendicitis, delays past stage 2 raise death risk. Hospital stays lengthen with complications.
Fertility issues can occur in women from scar tissue. Chronic pain might linger. Early treatment cuts these risks.
Prevention Tips
Prevent appendicitis with a high-fiber diet to keep stool soft. Eat fruits, veggies, and whole grains. Stay hydrated to aid digestion. Avoid smoking, as it might harm gut health. Good hygiene cuts infection risks. No sure way exists, but healthy habits help. If family has history, watch symptoms closely. Regular check-ups spot gut issues early.
Exercise keeps bowels moving. Probiotics from yogurt support gut bacteria. Limit processed foods.
When to See a Doctor
See a doctor if belly pain lasts over 4 hours, especially right side. Fever, vomiting, or appetite loss are red flags. In the 4 stages of appendicitis, early help is best. Go to ER if pain worsens suddenly or you feel faint. Kids need quick care if they cry from pain. Do not use heat pads or laxatives—they can rupture the appendix. Better safe than sorry.
Final Thoughts
The 4 stages of appendicitis highlight why fast action matters. From early swelling to possible rupture, knowing signs saves lives. This guide gives you tools to recognize and respond. Stay informed, eat well, and seek care when needed. Health is your top asset—protect it. If in doubt, consult a professional.
Share this content:

Common Features in Music And Healthcare Apps

Understanding Finnorth: A Simple Guide to Its Role in Finance

Jipinfeiche: A Guide to the Need for Speed Series

Uncuymaza: Understanding the Popular Online Platform and Its Impact

The Complete Guide to XXXXXXXL Size CXX Clothing

Understanding Archivebate: A Complete Guide to the Webcam Archive Platform
-
 Tech2 weeks ago
Uncuymaza: Understanding the Popular Online Platform and Its Impact
-
 Lifestyle2 weeks ago
The Complete Guide to XXXXXXXL Size CXX Clothing
-
 Lifestyle1 week ago
Understanding Archivebate: A Complete Guide to the Webcam Archive Platform
-

 Tech2 weeks ago
The Complete Guide to Uvlack: What It Is, How It Works, and Why It Matters
-
 Tech2 weeks ago
Understanding Frehf: A Guide to Modern Human-Technology Harmony
-
 Health2 weeks ago
Bntamnh E: Your Full Guide to This Important Nutrient
-

 Tech2 weeks ago
Depomin82: The Complete Guide to This Popular Sports Streaming Platform
-
 Travel2 weeks ago
Understanding Tumbons: A Complete Guide to Thailand’s Local Subdistricts